Index
- Introduction
1.2 Thanks
1.3 The Docker Solution
- Installing Docker
3.1 Minimum Requirements
3.2 Installing
- Setting up Docker
4.1 Docker Images
4.2 Docker Compose
4.3 Yml file
4.4 Implementation
- Docker Compose Commands
5.1 Spin Up Containers
5.2 Check Created Containers
5.3 Restart Containers
5.4 Tear Down Containers
- Run Tests in a Container
6.1 Conventions
6.2 Implementation
6.3 Run tests in a container
- Scale Tests with Containers
7.1 Scale docker containers
7.2 Run parallel tests in a container
1. Introduction
1.1 Thanks
- This tutorial was created based on the course “Scaling Tests with Docker” by Carlos Kidman.
- Course available at “Testing Automation University”.
1.2 The Docker Solution
While developing test automation projects two main problems emerge with it:
- UI tests are slow and take too much time to run.
- Outside variables like environments can make the tests flaky.
Let’s use Docker to solve it.
2. What is Docker
“Docker is designed to build, ship and run business critical applications at scale.”
– docs.docker.com
With docker you can build and share containers and automate the development pipeline from a single environment.
Each of these containers represent a piece of the app or the system.
Images (BluePrints):
- Just like images for VMs, docker image specs are used to create containers.
Containers:
- Allow you to package the things you need.
- Are faster and lightweight than virtual machines.
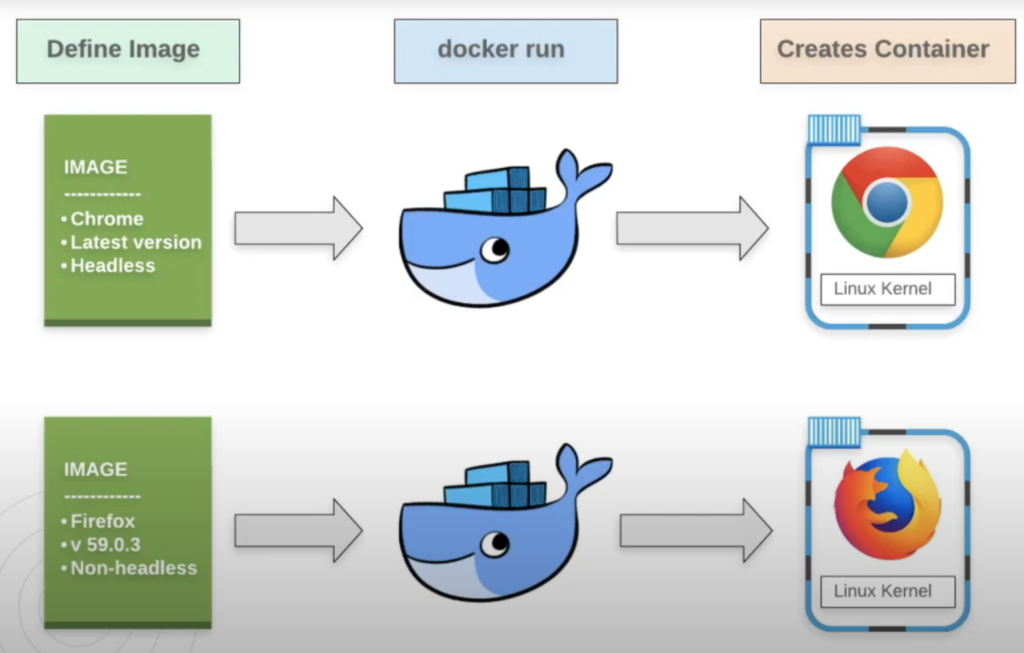
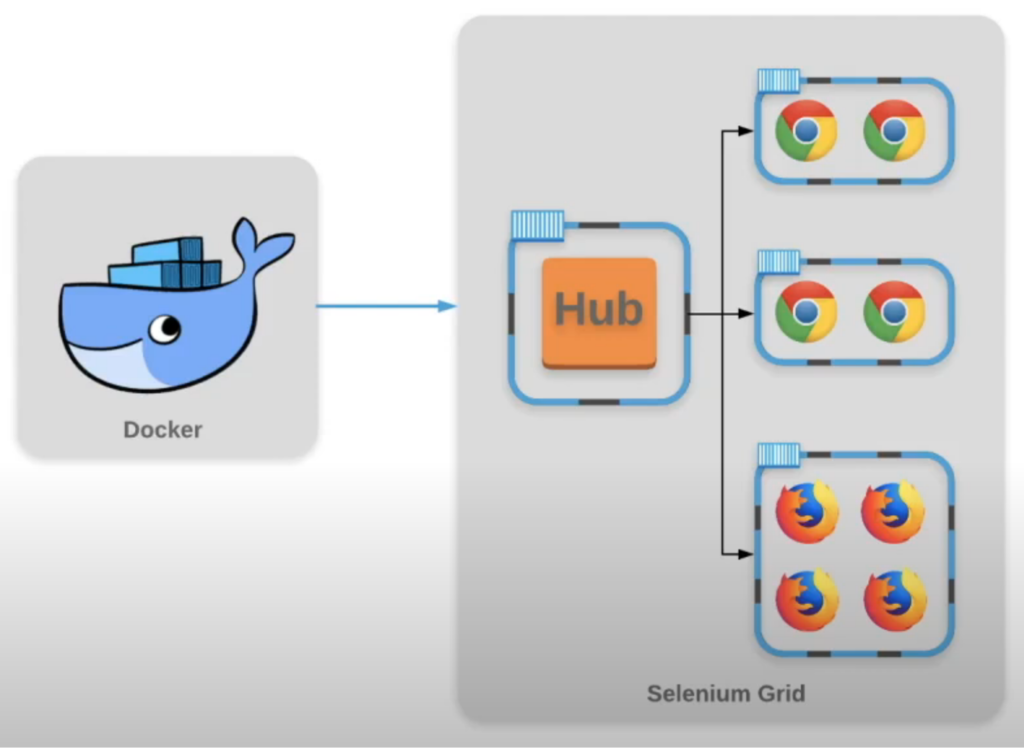
In this tutorial we will use versions of chrome and firefox images and a “Selenium Grid” image to spin up as many containers as we need.
With a few simple commands we will spin up, restart and tear down an entire grid in seconds.
3. Installing Docker
3.1 Minimum Requirements
Before you start to install docker check if you have enabled virtualization:
Enable windows virtualization through BIOS.
3.2 Installing
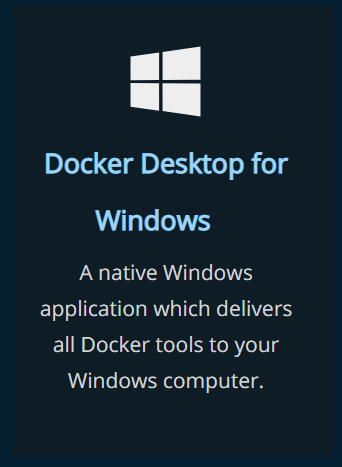
Click the link below to choose the docker version you want to install, in this tutorial I’m going to show you how to install the windows version:
https://docs.docker.com/get-docker/.
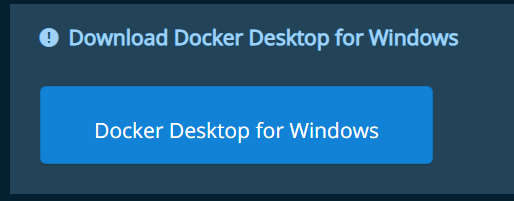
Step 1 – Choose the windows version.
Step 2 – Download it.
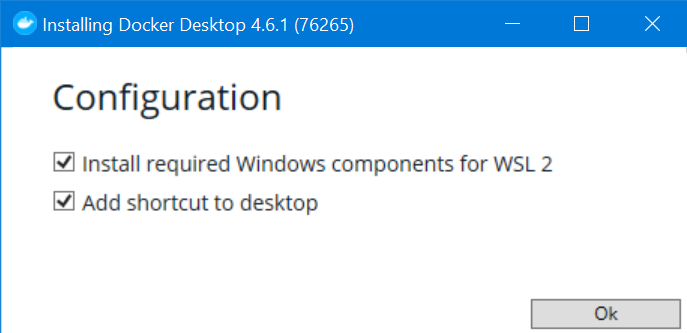
Step 3 – Check at least the “WSL 2” option and click OK.
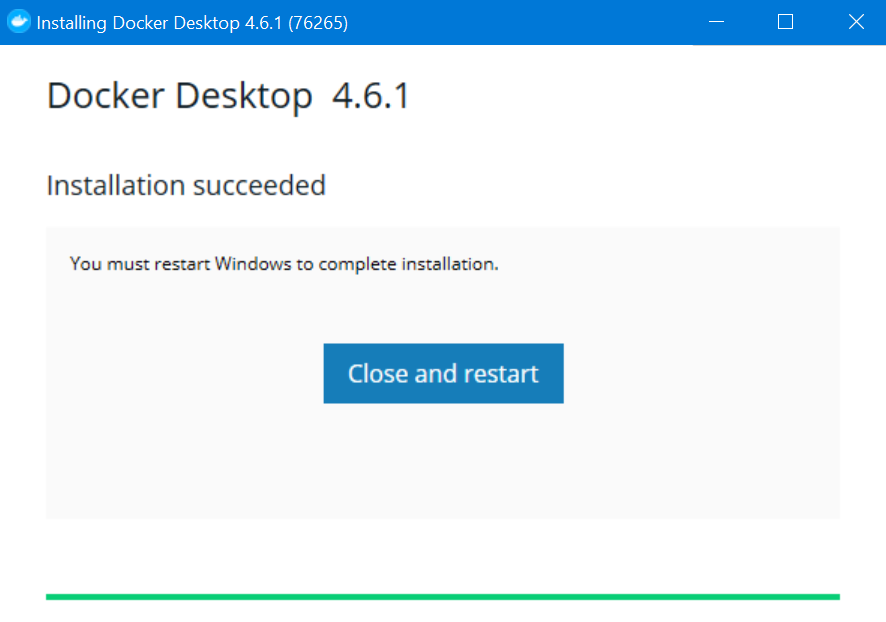
Step 4 – Click the button “Close and restart”.
Step 5 – Check the “I accept the terms” option and click Accept.

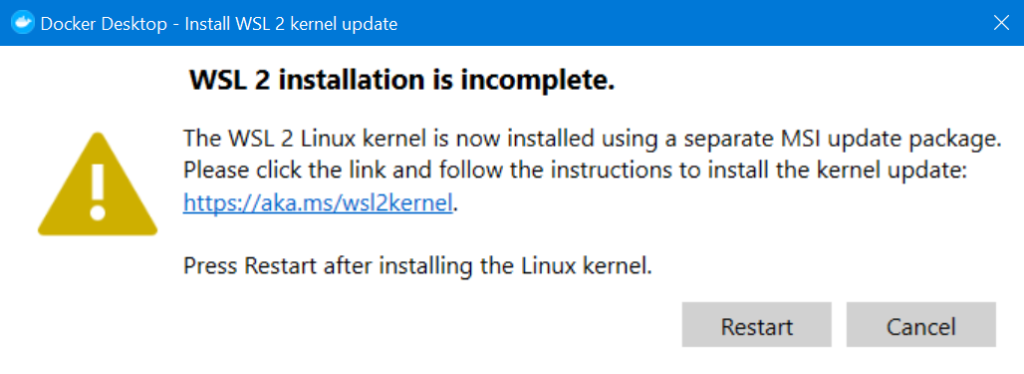
Step 6 – If the message in the image below is shown to you, go to the link below and install the wsl update for windows.
Update WSL2 Linux kernel update package for x64.
After installing it click Restart.
Step 7 – Docker engine is running and ready to use.
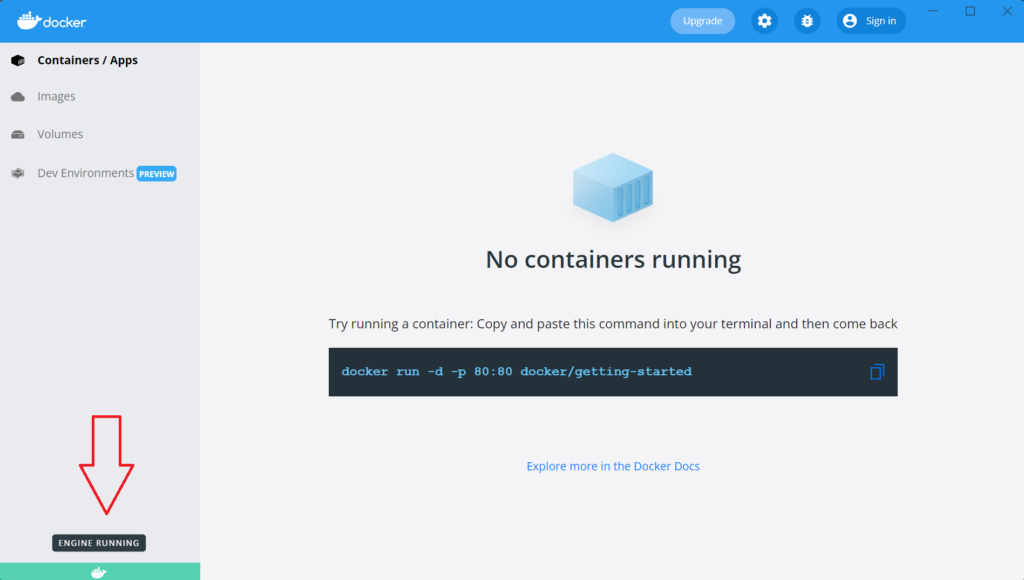
Step 8 – To check if docker was installed successfully open the “Command Prompt” and run the command below.
docker version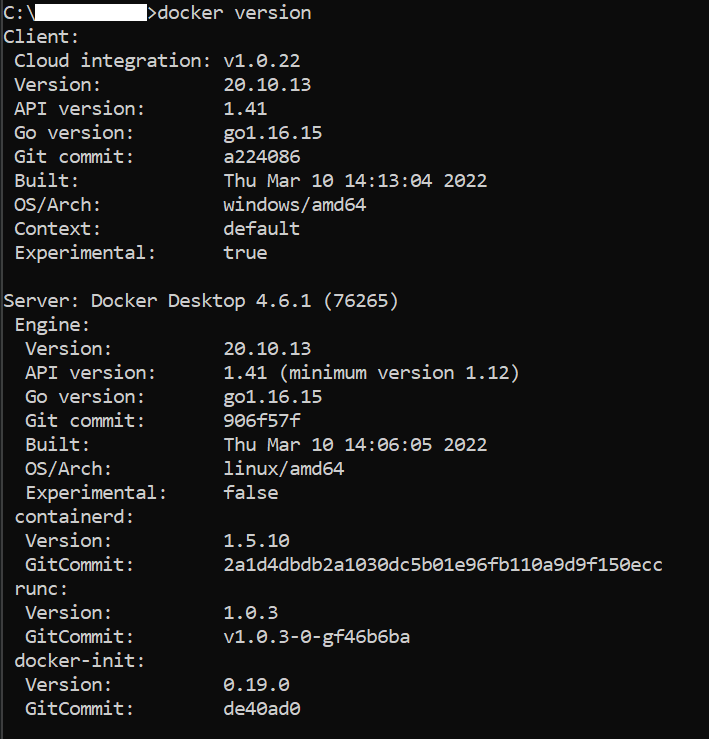
4. Setting up Docker
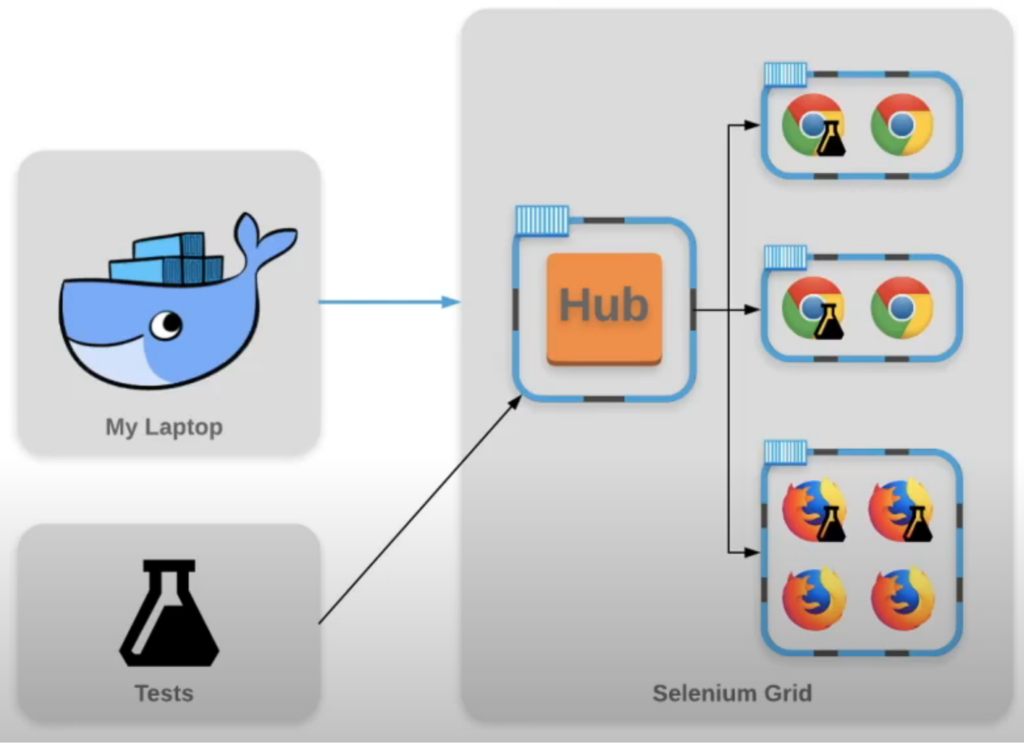
The image below represents the project structure.
There are three main pieces in our grid setup:
- Docker Engine (My Laptop).
- Hub Container (Selenium Grid node)
- Node containers (The browsers connected to the hub).
The tests will be run against the hub that will balance them across the nodes.
The hub and nodes are containers, to create containers you need docker images.
4.1 Docker Images
To download the docker images go to docker hub, this site is a repository of docker images where you can save and/or download images from.
Downloading the images requires that you have created an account.
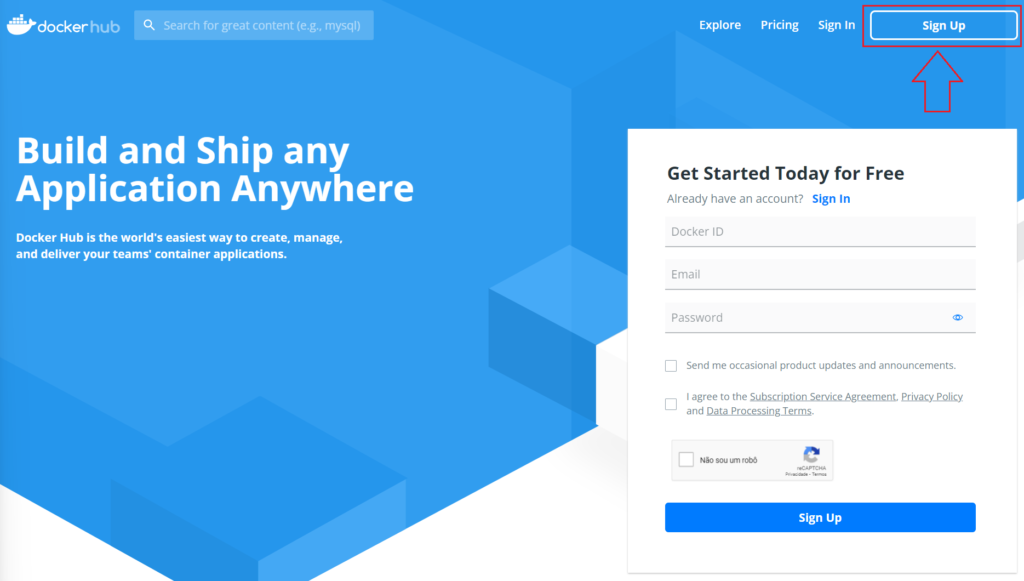
After creating your account proceed to login.
After login search for “selenium”:
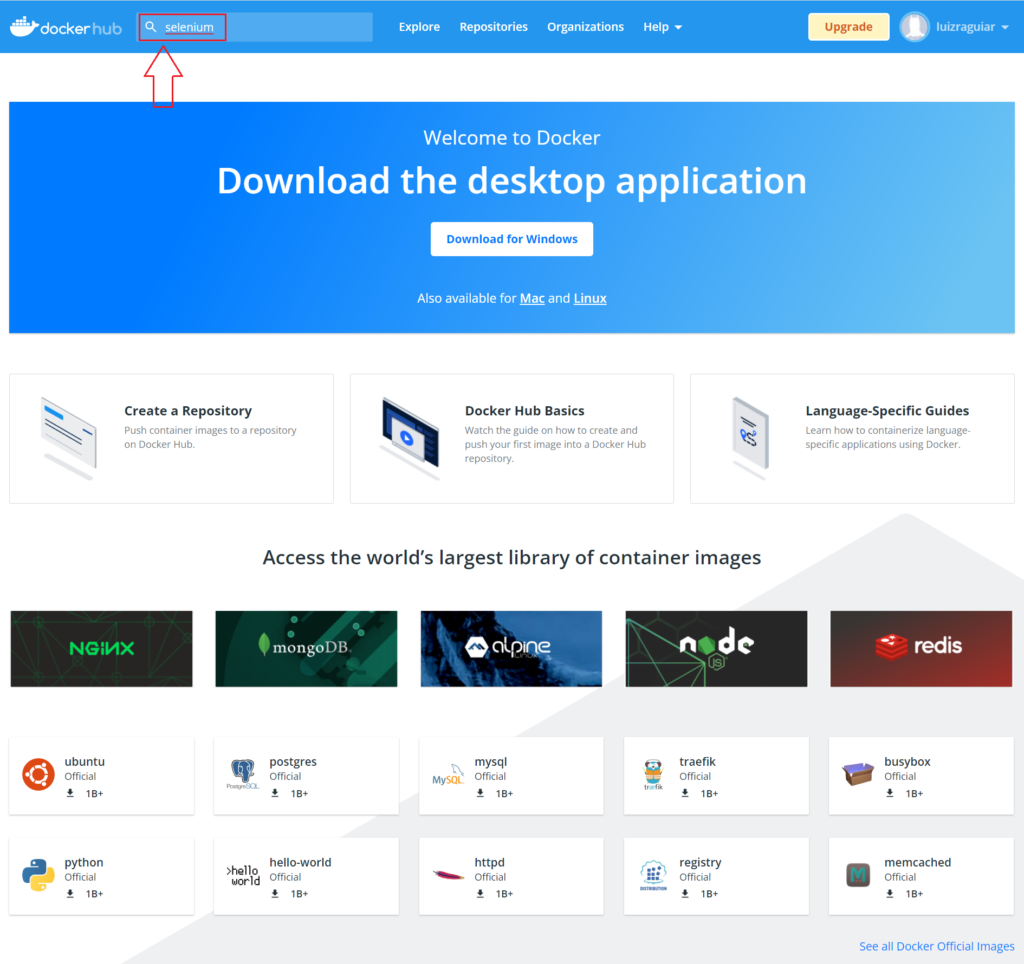
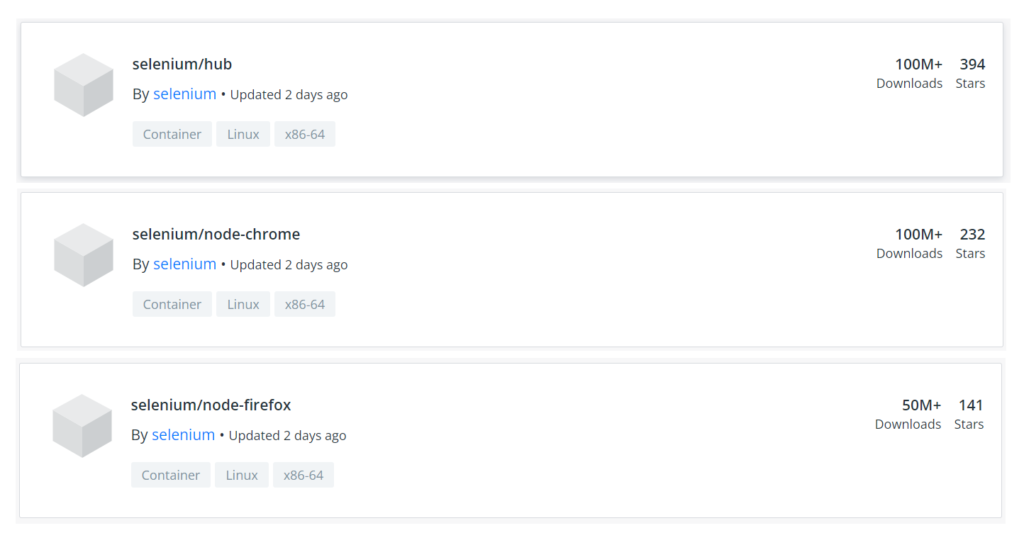
Search for the nodes provided by selenium, then download the following ones:
- selenium/hub
- selenium/node-chrome
- selenium/node-firefox
To download each docker image click on them, copy the “Docker Pull Command” field in your “Command Prompt” and confirm.
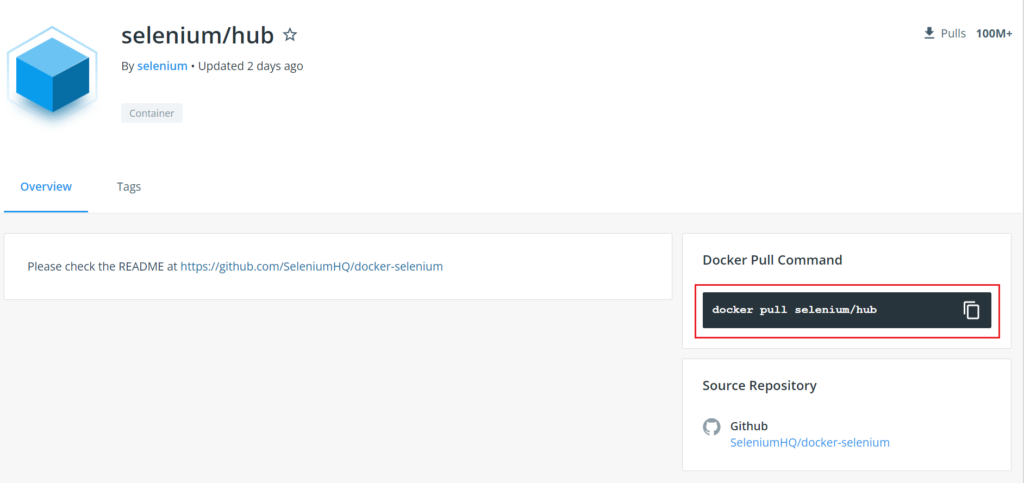
docker pull selenium/hub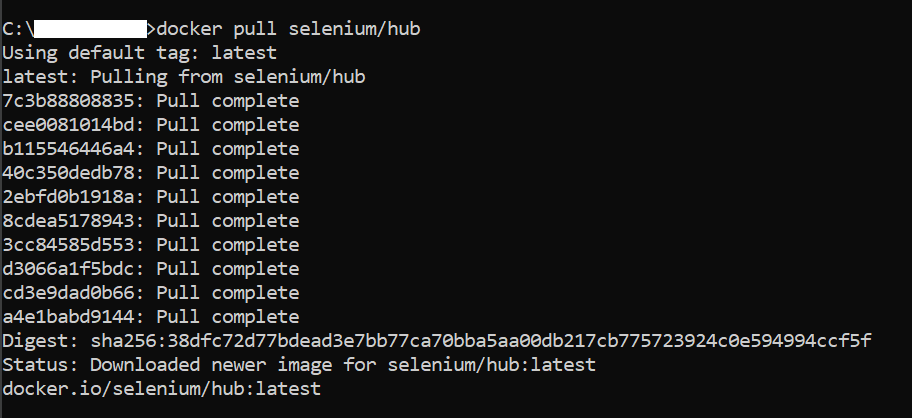
Repeat the docker pull process for the other 2 images listed previously.
docker pull selenium/node-chrome
docker pull selenium/node-firefox
To check if the images were successfully downloaded run the command below:
docker images
4.2 Docker Compose
To create one container at a time you have to use the command “docker run”.
In our tutorial we will create our containers all at once with only one command using docker compose yml.
Docker compose is a part of docker that has its own commands and uses yml file to describe the containers`s specifications.
Docker compose defines a single yml file with the services (containers) you want, then it uses the “docker-compose” command to create it all at once.
4.3 Yml file
To setup a “docker-compose.yml” file we are going to use the previous tutorial repo:
https://github.com/LuizGustavoR/intro-selenium-py/tree/tutorial/parallel-tests
(branch: tutorial/parallel-tests).
Clone it in your machine and open it using VS Code.
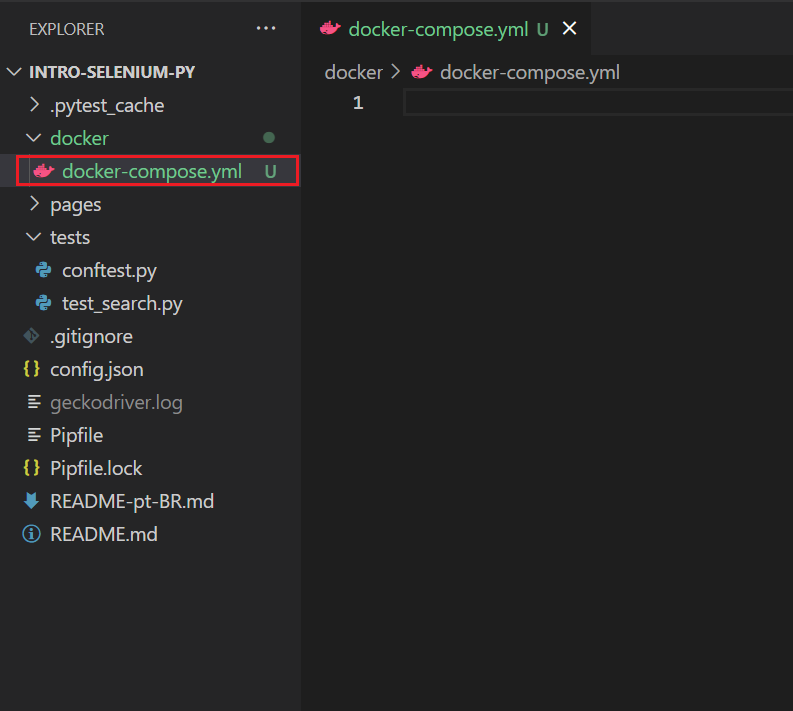
It’s ok to create the “docker-compose.yml” file in any place inside the project,
but in this tutorial we will put it inside a folder named “docker”.
“docker/docker-compose.yml”:
4.4 Implementation
version: "3"
services:

  selenium-hub:
    image: selenium/hub
    container_name: selenium-hub
    ports:
      - "4444:4444"

  chrome:
    image: selenium/node-chrome
    shm_size: 2gb
    depends_on:
      - selenium-hub
    environment:
      - SE_EVENT_BUS_HOST=selenium-hub
      - SE_EVENT_BUS_PUBLISH_PORT=4444
      - SE_EVENT_BUS_SUBSCRIBE_PORT=4443
      - SE_NODE_OVERRIDE_MAX_SESSIONS=true
      - SE_NODE_MAX_SESSIONS=3

  firefox:
    image: selenium/node-firefox
    shm_size: 2gb
    depends_on:
      - selenium-hub
    environment:
      - SE_EVENT_BUS_HOST=selenium-hub
      - SE_EVENT_BUS_PUBLISH_PORT=4444
      - SE_EVENT_BUS_SUBSCRIBE_PORT=4443
      - SE_NODE_OVERRIDE_MAX_SESSIONS=true
      - SE_NODE_MAX_SESSIONS=4
For more information about how docker-compose works visit:
https://github.com/SeleniumHQ/docker-selenium
5. Docker Compose Commands
Open the “Command Prompt” inside the directory you saved the “docker-compose.yml” file:

5.1 Spin Up Containers
To run the images and create the containers run the command below:
docker-compose up -d

To list the containers created run the command below:
docker ps -a
5.2 Check Created Containers
You can check if the containers were created accessing the url below:
http://localhost:4444/
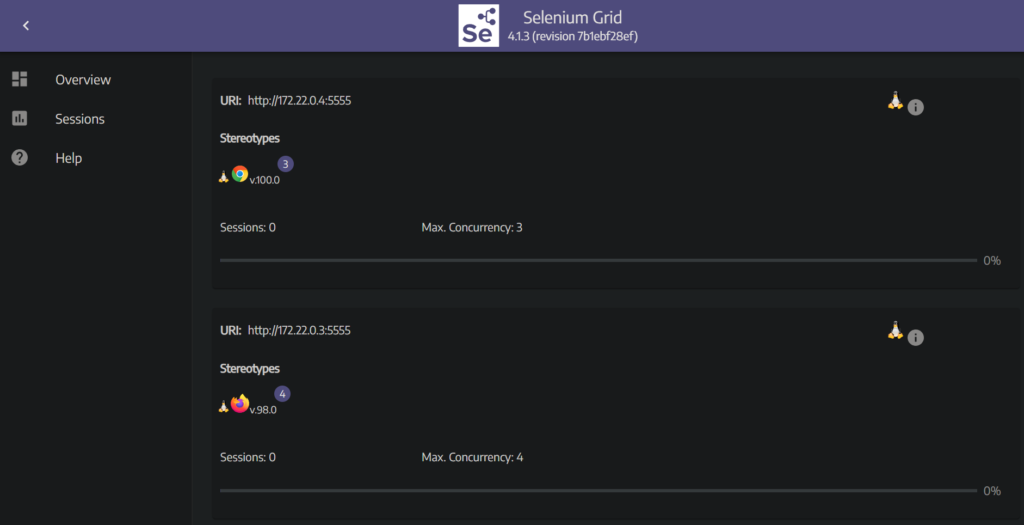
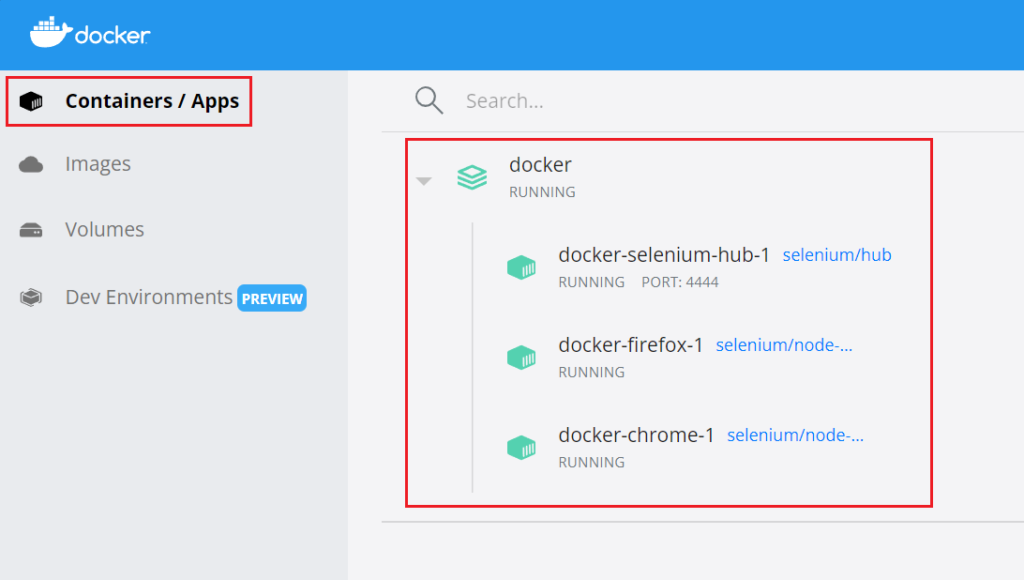
You can also check the containers you’ve just created using the desktop version of docker you installed in your machine.
5.3 Restart Containers
To restart the grid run the command below:
docker-compose restart
5.4 Tear Down Containers
To tear down the grid run the command below:
docker-compose downTo check if the containers are down run the command below:
docker ps -a
6. Run Tests in a Container
6.1 Conventions
As discussed in the tutorial “Tests in Parallel”, to run tests in parallel (and scale them) you will need:
- Run tests independently.
- Tests do not share a driver (webdriver).
Tip:
- Remember to report the test results in the machine that the “Docker Engine” is running (in this tutorial your machine).
- Each report file name must be unique so they do not get overridden.
PS: Bug reports will not be implemented in this tutorial.
6.2 Implementation
To run the project in a docker container it’s necessary to edit 3 files in our project:
- docker-compose.yml (Already edited in chapter “4.4 Implementation”).
- config.json
- conftest.py
“config.json”:
{
    "browser": "Headless Chrome",
    "type": "remote",
    "implicit_wait": 10,
    "url_remote": "http://127.0.0.1:4444/wd/hub"
}
“conftest.py”:
"""
This module contains shared fixture.
"""

import json
import pytest
import selenium.webdriver

# scope='session' makes
# this fixture run only one time before the entire test suite
@pytest.fixture
def config(scope='session'):

    # Read the file
    with open('config.json') as config_file:
        config = json.load(config_file)

    # Accept values are acceptable
    assert config['browser'] in ['Firefox', 'Chrome', 'Headless Firefox', 'Headless Chrome']
    assert config['type'] in ['local', 'remote']
    assert isinstance(config['implicit_wait'], int)
    assert config['implicit_wait'] > 0
    assert isinstance(config['url_remote'], str)
    assert len(config['url_remote']) > 0

    # Return config so it can be used
    return config

# This fixture will run once for each test case
@pytest.fixture
def browser(config):

    # Initialize the local WebDriver instance
    if config['type'] == 'local':

        if config['browser'] == 'Firefox':
            b = selenium.webdriver.Firefox()
            opts.add_argument('--window-size=1920,1080')
            b = selenium.webdriver.Firefox(options=opts)
        elif config['browser'] == 'Chrome':
            opts = selenium.webdriver.ChromeOptions()
            opts.add_argument('--window-size=1920,1080')
            b = selenium.webdriver.Chrome(options=opts)
        else:
            raise Exception(f'Browser "{config["browser"]}" is not supported in local mode')

    # Initialize the remote WebDriver instance
    elif config['type'] == 'remote':

        if config['browser'] == 'Headless Firefox':
            opts = selenium.webdriver.FirefoxOptions()
        elif config['browser'] == 'Headless Chrome':
            opts = selenium.webdriver.ChromeOptions()
        else:
            raise Exception(f'Browser "{config["browser"]}" is not supported in remote mode')

        opts.add_argument('--no-sandbox')
        opts.add_argument('--headless')
        opts.add_argument('--disable-gpu')
        b = selenium.webdriver.Remote(
            command_executor = config['url_remote'],
            options=opts
        )

    # Make its calls wait for elements to appear
    b.implicitly_wait(config['implicit_wait'])

    # Return the WebDriver instance for the setup
    yield b

    # Quit the WebDriver instance for the instance
    b.quit
6.3 Run tests in a container
First things first, check if there are any containers already up in your machine by running the command below:
docker ps -aContainers down:

PS: If you find any container up, tear them down by running the command below inside the project folder “docker“:
docker-compose downSpin up the new grid containers:
docker-compose up -dContainers up:

Get back from the folder “docker” to your project root by running the command “cd..”:

When inside your project root folder, to run your tests inside the docker container run the command below:
pipenv run python -m pytest
The 3 tests will run each one in a chrome container session:
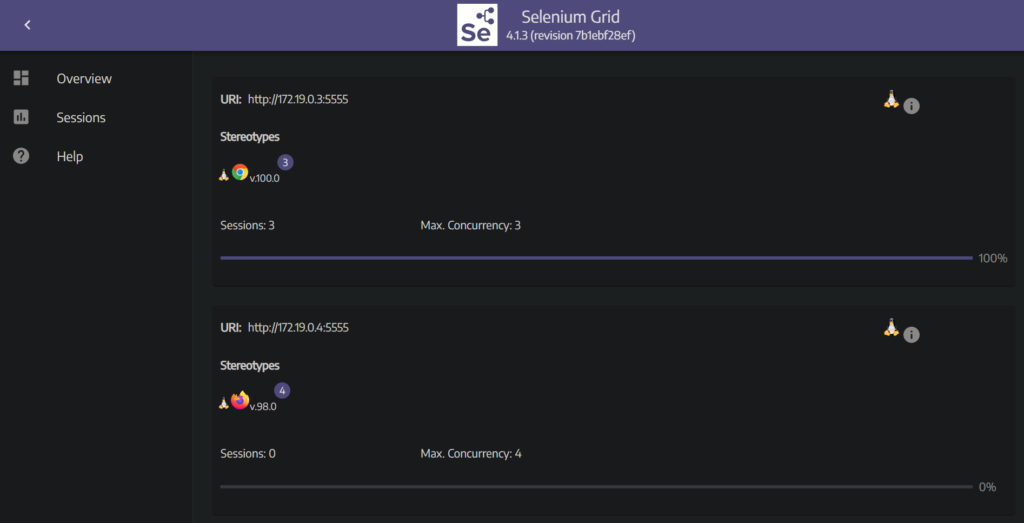
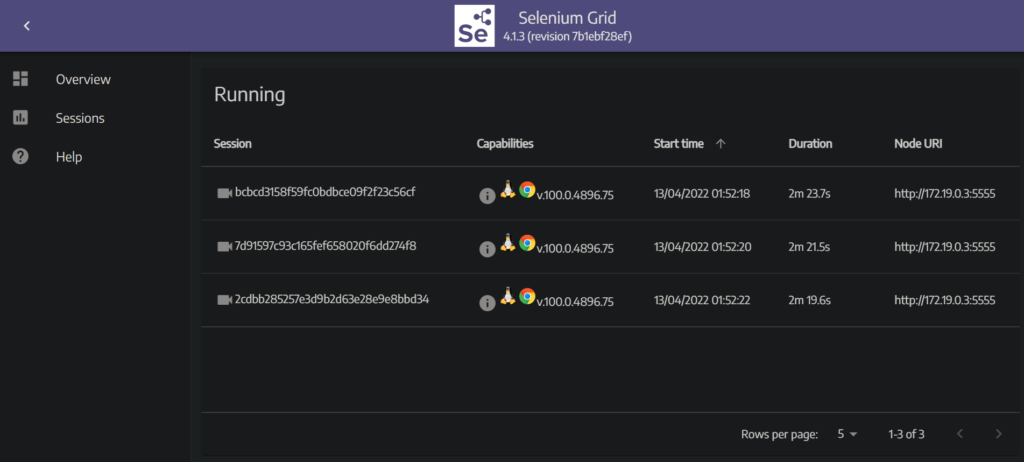
Note that after a test quits, it takes time for the container to clean the session.
So a new test will not start since there will be no sessions available.
To solve it you have 3 options:
- Restart the grid by running the command “docker-compose restart” inside the folder “docker” and then running the tests command again in the project root folder.
- Allow the chrome container to run more test sessions.
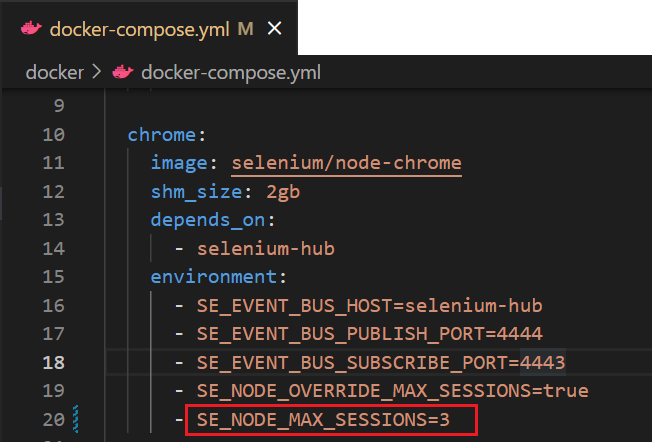
Do it by editing the “docker-compose.yml” file, for example:
Replace “SE_NODE_MAX_SESSIONS=3” for “SE_NODE_MAX_SESSIONS=6”.
PS: Don’t forget to run inside the project folder “docker” the command “docker-compose up” and “docker-compose down”, the command “docker-compose restart” will not update the max session number limit.
- The best and third option is to “Scale dockers containers”.
More details in the chapter below.
7. Scale Tests with Containers
7.1 Scale docker containers
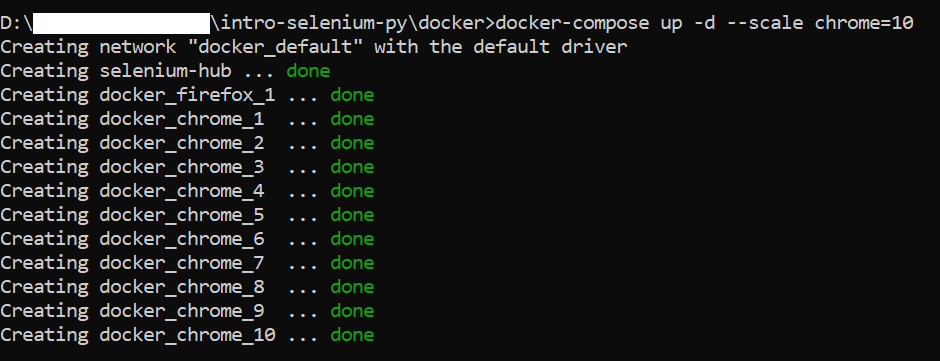
For you to scale by 10 the number of chrome containers declared in the “docker-compose.yml” file go to the folder “docker” inside the project and run the command below:
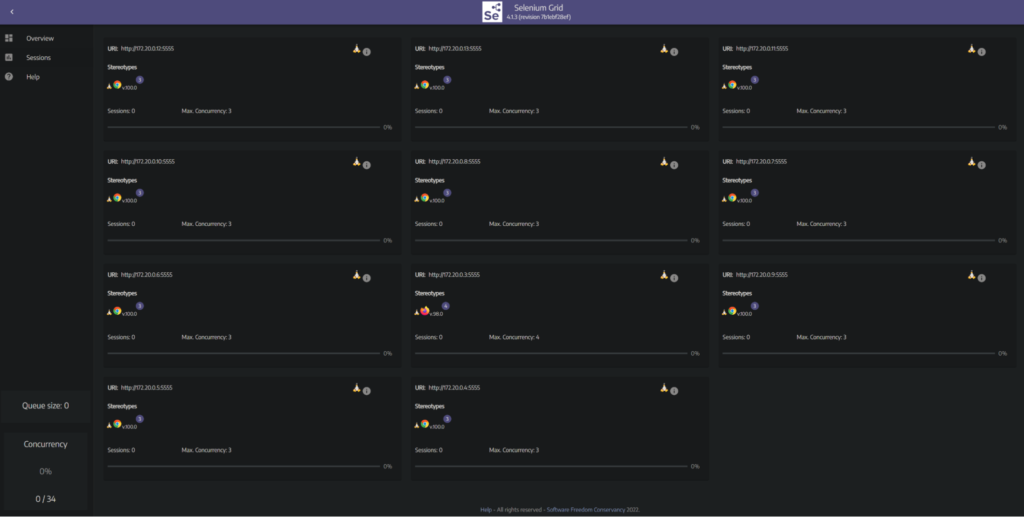
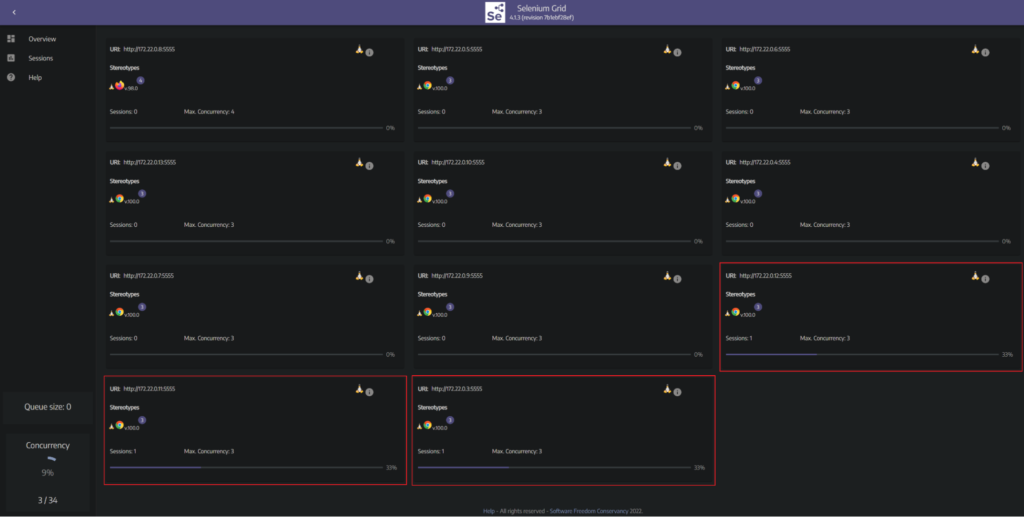
docker-compose up -d --scale chrome=10Now you have 10 chrome containers, each container having a maximum of 3 sessions running, resulting in a total of 30 sessions:
7.2 Run parallel tests in a container
If you want to run the tests in parallel like we did in the tutorial “Running Test in Parallel” using xdist, but in a container, just run the command below in the project root folder:
pipenv run python -m pytest -n 3
As you can see the selenium grid divided the test load, redirecting each test to run into a single container between the 10 we scaled above:
To shut it down all at once run the command below at the project folder “docker”:
docker-compose downPS: You can run both “non parallel” and “parallel” tests in a scaled grid, but “non parallel” tests will run one test after another even in a distributed node context, while “parallel“ tests will all start at the same time.
8. Repository
I created a new branch called “tutorial/scale-tests-docker” for this tutorial, click the link below to see it:
https://github.com/LuizGustavoR/intro-selenium-py/tree/tutorial/scale-tests-docker
The end.
9. Bibliography
- https://hub.docker.com/_/docker
- https://docs.docker.com/get-docker/
- https://docs.docker.com/desktop/windows/install/
- https://docs.microsoft.com/en-us/windows/wsl/install-manual#step-4—download-the-linux-kernel-update-package
- docker-selenium/docker-compose-v3.yml at trunk · SeleniumHQ/docker-selenium · GitHub
- https://www.programcreek.com/python/example/100023/selenium.webdriver.Remote
