Index
- Initial Setup
3.1 Introduction
3.2 Clone Project
3.3 Setting Up Pytest-BDD
3.4 Folders
- Gherkin
4.1 Declaration of Parameters in Feature Files
4.2 Gherkin Scenarios Implementation
- Step Definition
5.1 Scenarios VS Scenario
5.2 Step Definition Declaration of Parameters
5.3 Step Definition Implementation
1. Thanks
- This guide was created based on the course “Behavior Driven Python with pytest-bdd” by Andrew Knight.
- Course available at “Testing Automation University”.
2. Pytest-BDD
In this tutorial we will use pytest-bdd.
Pytest-bdd is a plugin for pytest.
Being one of the best and most popular test frameworks in python, pytest also comes with a bunch of other plugins, such as:
- Pytest-cov (For code coverage).
- Pytest-html (For html reports).
- Pytest-xdist (For parallel execution).
3. Initial Setup
3.1 Introduction
For this tutorial you will need previous knowledge that was seen in this tutorial made with python, selenium and pytest.
3.2 Clone Project
We are going to continue from a previous automation project “Scaling Tests with Docker and Python”.
Make sure you clone the right branch so we can start: “tutorial/scale-tests-docker”.

After cloning it, check in the VSCode if you cloned the right branch.

3.3 Setting Up Pytest-BDD
Use pipenv to create a virtual environment for the project and to manage its dependencies.
Open the project root in your “Command Prompt”.

And run the command below.
pipenv installThe pipenv install command will install all the dependency packages specified in the “Pipfile” file.

Use pipenv to install one more dependency package that we will use in this tutorial.
pipenv install pytest-bdd
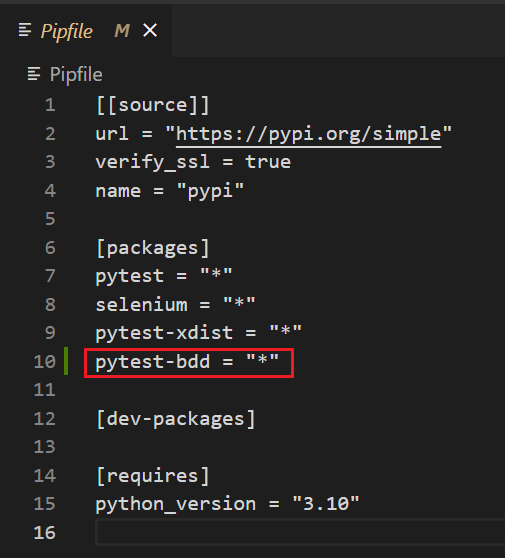
After installing pytest-bdd you can check that it was added in the “Pipfile” and “Pipfile.lock” file.
“Pipfile”:

“Pipfile.lock”:

3.4 Folder
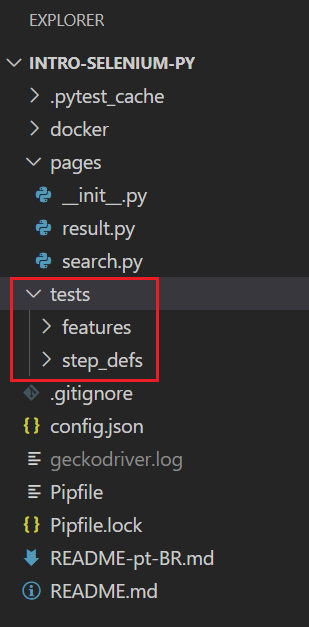
Create the “features” and “step_defs” folders inside “tests” in your project.

- The “features” folder is where the gherkin scenarios are located.
- The “step_defs” folder is where all the python modules, including conftest and the step definition codes are located.
- Step definition is the implementation for each of those lines of gherkin.
4. Gherkin
First you have to map and then write into the feature files the gherkin scenarios you planned.
Only after having the scenarios you should implement the step_definition.
4.1 Declaration of Parameters in Feature Files
The declaration of parameters are made with double quotes, ex:
When the user searches for "panda"
The “scenario outline” parameters are declared between <>, ex:
When the user searches for <name>
A parameter written in multiple lines should be declared between triple quotes, ex:
When the user searches for the phrase:
	"""
	Line1,
	Line2,
	Line3.
	"""
4.2 Gherkin Scenarios Implementation
In the feature file below you can see a normal gherkin file structure.
It has three testing scenarios:
- The first is a normal scenario receiving a param and checking the results.
- The second is a scenario outline.
- The third one is a normal scenario with multi line parameters.
The background works almost like a setup function, it runs before each scenario.
“web.feature”:
Feature: DuckDuckGo Web Browsing
    As a web surfer,
    I want to find information online,
    So I can learn new things and get tasks done.

    Background:
        Given the DuckDuckGo home page is displayed

    Scenario: Basic DuckDuckGo Result Title
        When the user searches for "panda"
        Then results title contains "panda"

    Scenario Outline: Basic DuckDuckGo Search
        When the user searches for <name>
        Then results are shown for <found_animal>

    Examples: Animals
        | name       | found_animal |
        | panda      | panda        |
        | python     | python       |
        | polar bear | polar bear   |

    Scenario: Lengthy DuckDuckGo Search
        When the user searches for the phrase:
            """
            When in the Course of human events, it becomes necessary for one people
            to dissolve the political bands which have connected them with another,
            and to assume among the powers of the earth, the separate and equal
            station to which the Laws of Nature and of Nature's God entitle them,
            a decent respect to the opinions of mankind requires that they should
            declare the causes which impel them to the separation.
            """
        Then one of the results contains "Declaration of Independence"
5. Step Definition
5.1 Scenarios VS Scenario
Inside a step definition file you have to declare what feature is going to be implemented.
There are two options.
- First Option.
Declaring and implementing scenarios individually in the step definition.
from pytest_bdd import scenario

@scenario('../features/web.feature', "Basic DuckDuckGo Search")
def test_scenario_basic_search():
    pass

@scenario('../features/web.feature', "Lengthy DuckDuckGo Search")
def test_scenario_lengthy_search():
passPS: The scenario function names should start with “test_”.
- Second Option (The option we are going to use in this tutorial).
The optimized way to declare and implement scenarios is to use “scenarios” instead of “@scenario”.
One of the pros is that implementing the “def” function is not needed.
from pytest_bdd import scenarios
scenarios('../features/web.feature')
5.2 Step Definition Declaration of Parameters
The parameter with double quotes should be declared as below.
@when(parsers.parse('the user searches for "{parameter}"'))
The “scenario outline” and the multi lines params (that use triple quotes) should be declared as below, without the quotes.
@when(parsers.parse('the user searches for {parameter}'))
5.3 Step Definition Implementation
The code below shows it’s possible that a step definition can be used by more than one gherkin scenario.
from pytest_bdd import scenarios, given, when, then, parsers

from selenium.webdriver.support.ui import WebDriverWait
from selenium.webdriver.support import expected_conditions as EC

from pages.search import DuckDuckGoSearchPage
from pages.result import DuckDuckGoResultPage

scenarios('../features/web.feature')

@given('the DuckDuckGo home page is displayed')
def duckduckgo_home(browser):
    DuckDuckGoSearchPage(browser).load()
    pass

@when(parsers.parse('the user searches for "{text}"'))
@when(parsers.parse('the user searches for {text}'))
@when(parsers.parse('the user searches for the phrase:\n{text}'))
def search_phrase(browser, text):
    DuckDuckGoSearchPage(browser).search(text)

@then(parsers.parse('results title contains "{phrase}"'))
def search_results_title(browser, phrase):
    assert WebDriverWait(browser, 5).until(EC.title_contains(phrase))

@then(parsers.parse('results are shown for {phrase}'))
def results_have_one(browser, phrase):
    results = DuckDuckGoResultPage(browser).result_link_titles()
    assert len(results) > 0
    assert DuckDuckGoResultPage(browser).search_input_value() == phrase

@then(parsers.parse('one of the results contains "{phrase}"'))
def search_results(browser, phrase):
    results = DuckDuckGoResultPage(browser).result_link_titles()
    assert any(phrase in s for s in results)
6. Other Changes
If you want to see the tests running, change the “config.json” file to run locally.
“config.json”:
{
    "browser": "Chrome",
    "type": "local",
    "implicit_wait": 10,
    "url_remote": "http://127.0.0.1:4444/wd/hub"
}
PS: To successfully run your tests remember to check if your chromedriver or geckodriver are in the same version of the browsers installed in your machine.
Here’s a tutorial of how to install web drivers in your windows machine.
7. Running Tests
The command to run the tests is the same used in the previous tutorials.
pipenv run python -m pytest

8. Repository
I created a new branch called “tutorial/gherkin-pytest-bdd” for this tutorial, click the link below to see it:
https://github.com/LuizGustavoR/intro-selenium-py/tree/tutorial/gherkin-pytest-bdd
The end.
