Index
- Initial Setup
2.1 Clone Project
2.2 Run Test
- Conventions
3.1 Selenium Webdriver
3.2 Headless Browsers
3.3 Reading Inputs
- Firefox (GeckoDriver)
6.1 Setup GeckoDriver
6.2 Implement
- Conclusion
7.1 Repository
1. Introduction
This tutorial is the continuation of my other tutorial called “Selenium Webdriver with Python”.
Please take a look at it before starting this one.
This tutorial is based on the “Selenium WebDriver with Python” course, administered by Andrew Knight.
He also has a blog, click the link below to follow the news:
https://automationpanda.com/.
2. Initial Setup
As previously said, since this project continues the “Selenium Webdriver with Python” tutorial, you will have to clone its repo to continue your work.
2.1 Clone Project
Before you start, check if you are cloning the right branch:
“tutorial/webdriver-with-python”.
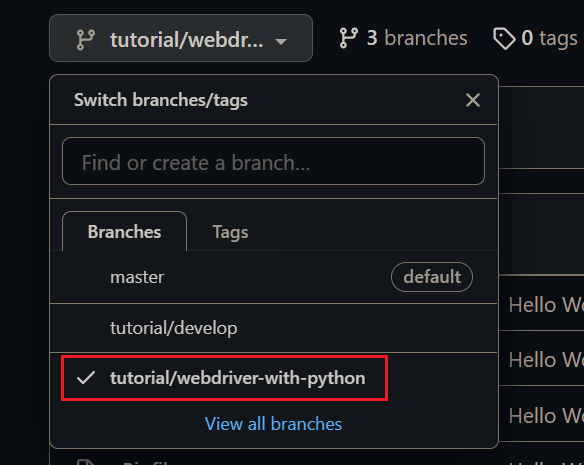
Git Repo:
https://github.com/LuizGustavoR/intro-selenium-py/tree/tutorial/webdriver-with-python
After cloning it check in the VSCode if you cloned the right branch:
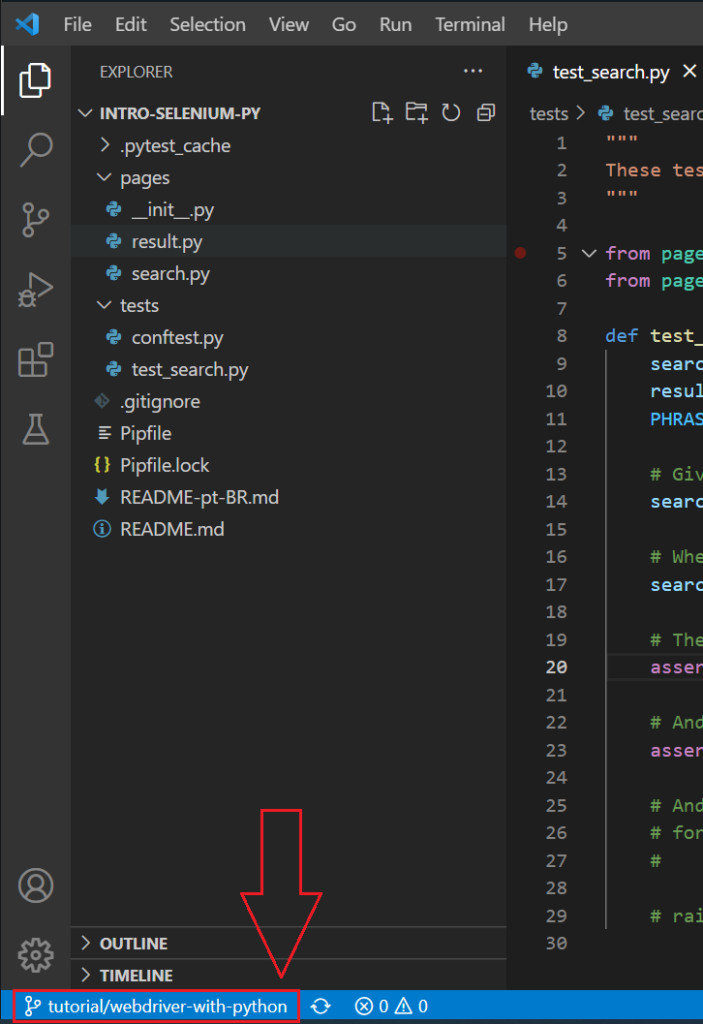
2.2 Run Test
To make sure the cloned project is actually working,
open the “Command Prompt” inside the project folder.

Run the command below:
pipenv run python -m pytestYou should see this message:

3. Conventions
3.1 Selenium WebDriver
As discussed in the previous tutorial, selenium Webdriver supports multiple browsers:
Our project is hardcoded to only run the tests in chrome,
Let’s change that.

3.2 Headless Browsers
Headless browsers run web pages but do not visually render them on screen, making the tests run more efficiently.
Both Firefox and Chrome have headless modes.
You can run non headless mode when developing and on headless mode when running on a CI.
3.3 Reading Inputs
Examples of inputs are urls, usernames, passwords, default timeout values.
Need to be passed into the automation when a test suite starts to run.
They should not be hardcoded into the automation code, especially if they are sensitive values like passwords.
4. JSON config file
In this tutorial we will use a json config file.
Python can parse a “.json” file into a dictionary in just one line.
Open the project through VSCode and create the “config.json” file in the project root:
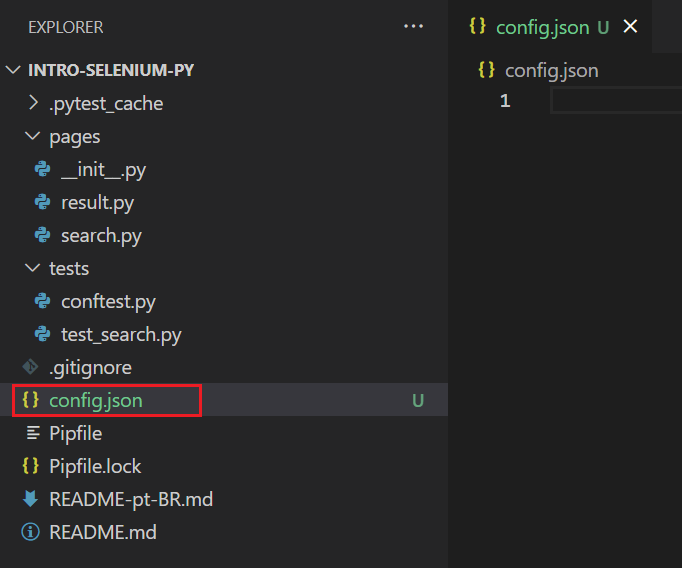
Fill the “config.json” file with the code below:
{
    "browser": "Headless Chrome",
    "implicit_wait": 10
}
5. Pytest Fixture
The “config.json” file values are going to be read inside a pytest fixture.
Open the “tests/conftest.py” file:
tests/conftest.py
"""
This module contains shared fixture.
"""

import json
import pytest
import selenium.webdriver

# scope='session' makes
# this fixture run only one time before the entire test suite
@pytest.fixture
def config(scope='session'):

    # Read the file
    with open('config.json') as config_file:
        config = json.load(config_file)

    # Accept values are acceptable
    assert config['browser'] in ['Firefox', 'Chrome', 'Headless Chrome']
    assert isinstance(config['implicit_wait'], int)
    assert config['implicit wait'] > 0

    # Return config so it can be used
    return config

# This fixture will run once for each test case
@pytest.fixture
def browser(config):

    # Initialize the WebDriver instance
    if config['browser'] == 'Firefox':
        b = selenium.webdriver.Firefox()
    elif config['browser'] == 'Chrome':
        b = selenium.webdriver.Chrome()
    elif config['browser'] == 'Headless Chrome':
        opts = selenium.webdriver.ChromeOptions()
        opts.add_argument('headless')
        opts.add_argument('--log-level=1')
        b = selenium.webdriver.Chrome(options=opts)
    else:
        raise Exception(f'Browser "{config["browser"]}" is not supported')

    # Make its calls wait for elements to appear
    b.implicitly_wait(config['implicit_wait'])

    # Return the WebDriver instance for the setup
    yield b

    # Quit the WebDriver instance for the instance
    B.quit
PS: Into the “Headless Chrome” option, the second argument added into the “ChromeOptions” setup was added to hide the message shown by the selenium webdriver when the site being tested blocks FLoC tracking.
FLoC is Google’s new tracking method.
FLoC is bad for privacy: It puts you in a group based on your browsing history, and any website can get that group FLoC ID to target and fingerprint you.
For more information read the link below:
Use the DuckDuckGo Extension to Block FLoC, Google’s New Tracking Method in Chrome.
6. Firefox (GeckoDriver)
6.1 Setup GeckoDriver
To run the tests in firefox download the latest stable release of the firefox driver (GeckoDriver) and extract the executable in the folder (C:\webdrivers\).
To download the GeckoDriver go to the page below:
https://github.com/mozilla/geckodriver/tags
Choose the latest stable version and click “Downloads”:
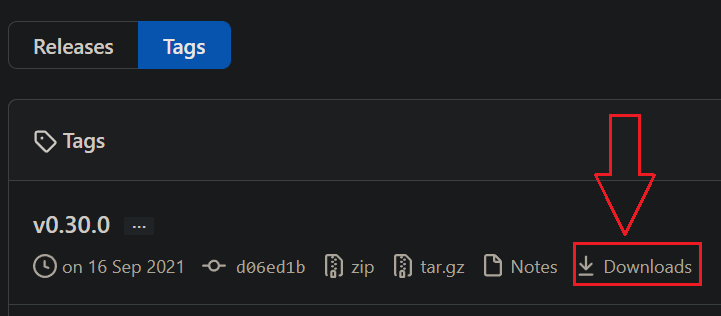
Then go to the bottom of the page on “Assets“ and choose the most suitable version for your OS (Windows, Linux, MacOS) and firefox (32 or 64 bits) version:
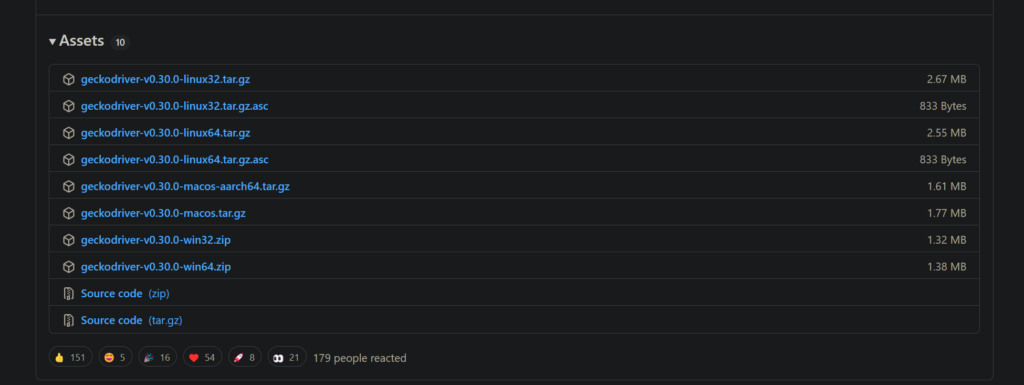
Don’t forget to extract the driver into the “webdrivers” folder.

PS: Don’t know how to set these webdrivers into your “Variables Environment” ?
Go to my other tutorial and learn how to: “Installing ChromeDriver on Windows”.
6.2 Implement
Don’t forget to extract the driver into the “webdrivers” folder.
tests/test_search.py
"""
These tests cover DuckDuckGo searches.
"""

from pages.search import DuckDuckGoSearchPage
from pages.result import DuckDuckGoResultPage

def test_basic_duckduckgo_search(browser):
    search_page = DuckDuckGoSearchPage(browser)
    result_page = DuckDuckGoResultPage(browser)
    PHRASE = "panda"

    # Given the DuckDuckGo home page is displayed
    search_page.load()

    # When the user searches for "panda"
    search_page.search(PHRASE)

    # And the search result query is "panda"
    assert PHRASE == result_page.search_input_value()

    # And the search result links pertain to "panda"
    # for title in result_page.result_link_titles():
    #     assert PHRASE.lower() in title.lower()

    # Then the search result title contains "panda"
    assert PHRASE in result_page.title()

    # raise Exception("Incomplete Test")
PS: Always assert “web elements” before “page attributes”.
Web Elements have the implicit wait setup for them, page attributes don’t, so if the selenium webdriver reads a page attribute before a slower browser sets the new attribute value the test will throw an error.
7. Conclusion
Change the parameter “browser” value inside the “config.json” file to the browser name you want to run the test.
{
    "browser": "Chrome",
    "implicit_wait": 10
}
Then run the command below in the prompt.
pipenv run python -m pytestHeadless Chrome

Chrome

Success.
Congratulations, the test ran as expected.
7.1 Repository
I created a new branch called “tutorial/multiple-browsers” for this tutorial, click the link below to see it:
https://github.com/LuizGustavoR/intro-selenium-py/tree/tutorial/multiple-browsers
The end.
8. Bibliography
- https://testautomationu.applitools.com/selenium-webdriver-python-tutorial/chapter7.html
- https://www.testgrid.io/blog/selenium-what-is-it/
- https://stackoverflow.com/questions/66997942/error-with-permissions-policy-header-when-using-chromedriver-to-a-headless-br
- https://spreadprivacy.com/block-floc-with-duckduckgo/
- https://github.com/mozilla/geckodriver/tags
